Cleaning your PS4 is a very important task that should be carried out regularly to prevent dust from entering the PS4 so that your PS4 can last a very long time and keep running well. Opening up your PS4 is a very simple task. This is because PlayStation knows that cleaning your PS4 is a very necessary task, so they have made it very easy for you to open your PS4. To keep the PS4 performing at its highest level, it is always a good idea to open it up and clean it regularly, as well as reduce the risk of dust and dirt damaging it.
In this article, I will explain how to open the cover of your PS4, and I will also discuss the right tools you will need to open and clean your PS4, as well as some of the consequences that come with not cleaning your PS4 regularly.
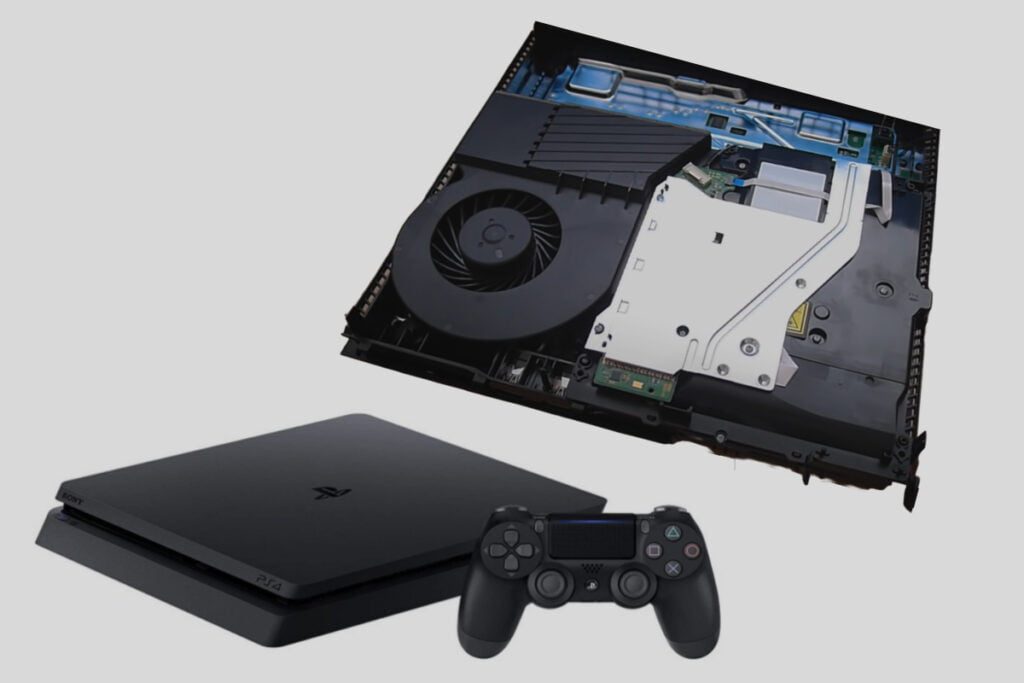
Related Post: Sony PlayStation 4 Pro Review.
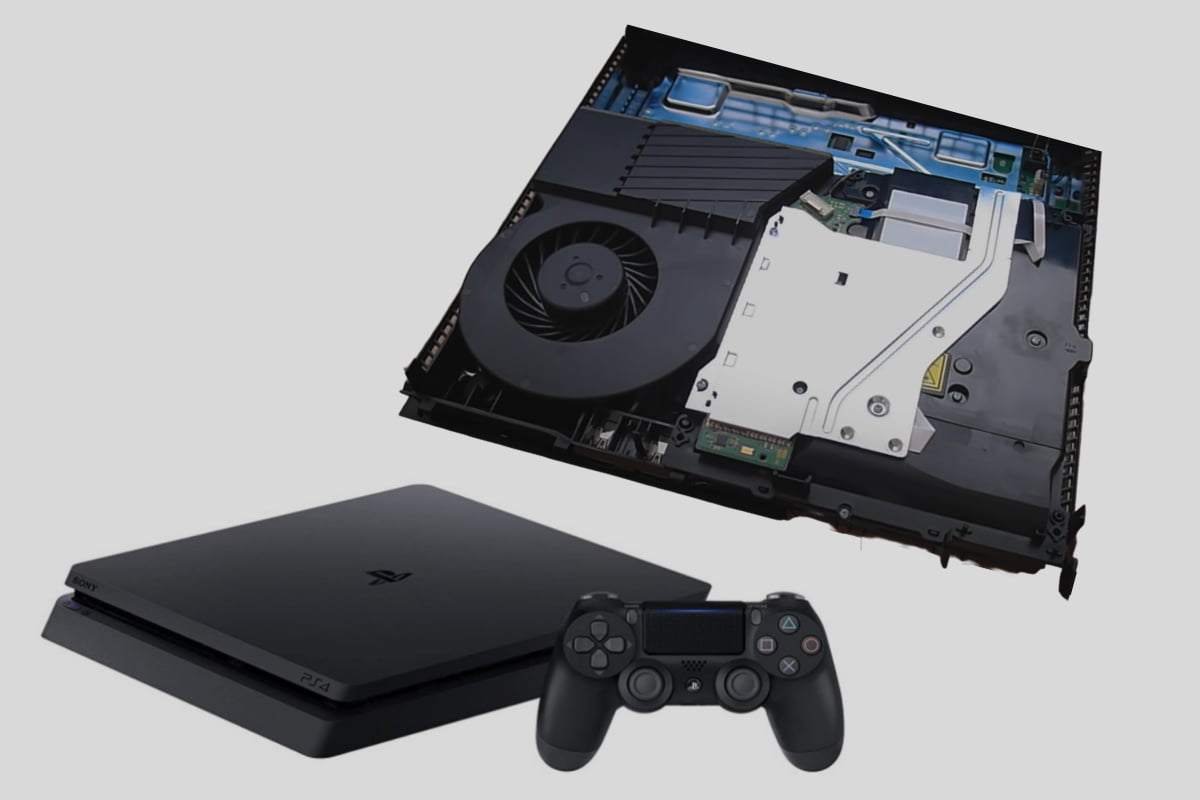
How to Remove the PS4 Cover to Clean the Inside of the Console
Removing the cover of your PS4 is a straightforward process, and you don’t need too many tools to do it. All you need is a small-sized flat-head Phillips screwdriver to open the screws on the cover on the cover of your PS4, or you could use a T8H Torx screwdriver to do it.
The PS4 faceplate, which has the PlayStation logo on it, is made of glossy plastic, so the first thing you would need to do is slide it off. Although it is very simple to remove, you must first press it down before sliding it away.
After that, you would need to remove the warranty tape covering the four bolts at the back of the console that is holding the top cover of the PS4 in place. After that, you can take the cover off. It should still be a little hard to take off because it is still clipped to the console, but after that, you should be able to clean your PS4 without any issues. Please note that your warranty becomes void the moment you remove one warranty sticker on your PS4.
What Kinds of Tools do I Need for Cleaning a PS4?
Cleaning your PS4 is a very simple task, but you will need a few tools to get the job done:
- A standard Phillips-head screw: You will need a screwdriver to open most of the screws on your PS4, but when you are getting your screwdriver, you should get it in a small size if possible.
- When it comes to disassembling your PS4, the 25-in-1 Torx Screwdriver Repair Toolset is a crucial set of tools. This is because there are a lot of screws in your PS4, and they are of varying sizes, so having a screwdriver set with multiple heads is never a bad idea.
- A knife or sharp object: This is for removing and peeling off the warranty stickers on your PS4, but you can also use one of the screwdrivers you have to do it.
- A can of compressed air, a blow-dryer, or a mini-vacuum cleaner: You need either of them to blow or suck out the dust on your PS4. I would suggest getting the vacuum because it sucks up the dust and doesn’t blow it through the PS4. However, either tool is very useful; at the very least, it beats blowing out the dust with your mouth.
- Cotton swabs: These are excellent tools for removing stubborn dirt or for removing dust from hard-to-reach places. It is also good for holding the fan in place when you are trying to blow out the dust.
- A Piece of Tape: A piece of sticky tape is very useful because it helps you keep all the tiny screws you remove from your PS4 stuck in one place instead of rolling around.
- A cleaning brush or an old toothbrush: this piece is extremely useful because it helps you scrape off the dust from the smaller gaps between the blades.
How Do I Clean My PS4?
Once you have opened your PS4, you will need to clean it, so here are a few steps to show you what you will need to do with the tools listed.
- Step One: Shut down the PS4 and unplug it:
To prepare for cleaning your PS4, you must first turn it off and remove all of the cables that are attached to it. The PS4 should have all of its lights off, and if you notice an orange light, that means it’s in rest mode, so you should completely shut it down. Holding down the power button for a few seconds or until you hear the PS4 beep twice will shut down the system completely, turning off all of the lights.
Alternatively, you can also turn it off by holding the PlayStation button on your controller to bring up the quick menu. Then enter the power symbol and then enter “turn off PS4″. Once it is off, you can proceed to unplug the power cable, the HDMI cable, and any other USB cables and accessories that are attached to the PS4.
Please make sure that you keep your PS4 in a clean and organised environment when you want to clean it. Also, it would be profitable to avoid cleaning it in a place that builds up static electricity. So, avoid shaggy carpets.
- Step two: Take off the black stickers and screws.
The next thing you would want to do is turn your PS4 so that its back is facing you, then flip it upside down so that you can see the three stickers at the top (P.S. it’s the bottom of the console). Please note that if you have a slightly updated version of the PS4, you will also see another sticker and screw in the middle.
Once you have removed the three stickers, you may want to keep them to re-apply or you may want to throw them away. Either way, the next thing to do is take your Torx screwdriver and, after you have removed the warranty stickers, remove each of the screws that have been left exposed. After that, you should be able to take off the cover of the PS4 and then clean out the dust from inside of it.
- Step Three: Remove the power supply.
The next thing you would need to do is take out the power supply unit (PSU) so that you can have access to the heat sink and handle the most thorough cleaning. There are five screws used to hold the PSU in place. Your T8H Torx screw can be used to remove three of them, and a regular Phillips-head screwdriver can remove the other two.
The two Philips-head screws are located on the far left and far right sides of the power supply. The third T8H Torx screw, on the other hand, would be located between the two Philips-head screws if you were using the updated version of the base PS4. It might take a little longer than usual to remove the screws because they are a little longer. After that, you should be able to remove the PSU.
Make sure to take note of the cable connecting it to the motherboard underneath. Please make sure you don’t accidentally disconnect it, as you don’t need to remove it. Then, carefully remove it by lifting both ends gently out of its case and then slowly placing it on the other side of the PS4 while it is still plugged in.
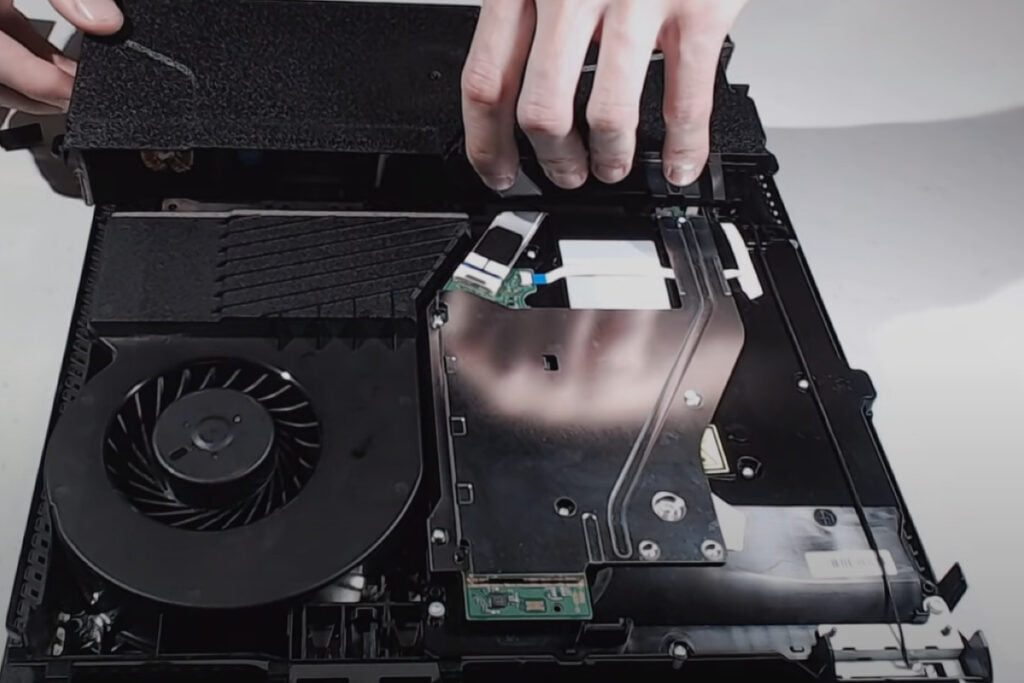
- Step Four: Blow the dust out of the PS4
I’ll explain how to clean the heat sink and fan now that you have access to them so you can get rid of the dust and debris inside the system. To remove the first bits of dust from the PS4, you should first use your compressed air can blow a few brief bursts of air across it.
Make sure you check the corners and edges for dust that’s trying to hide. You can use a flashlight to find them. Likewise, take care not to blow the dust further inside the system, which is why the vacuum is a better choice. You can also use the cotton swabs to get to those hard-to-reach areas where the dust is proving stubborn to remove.
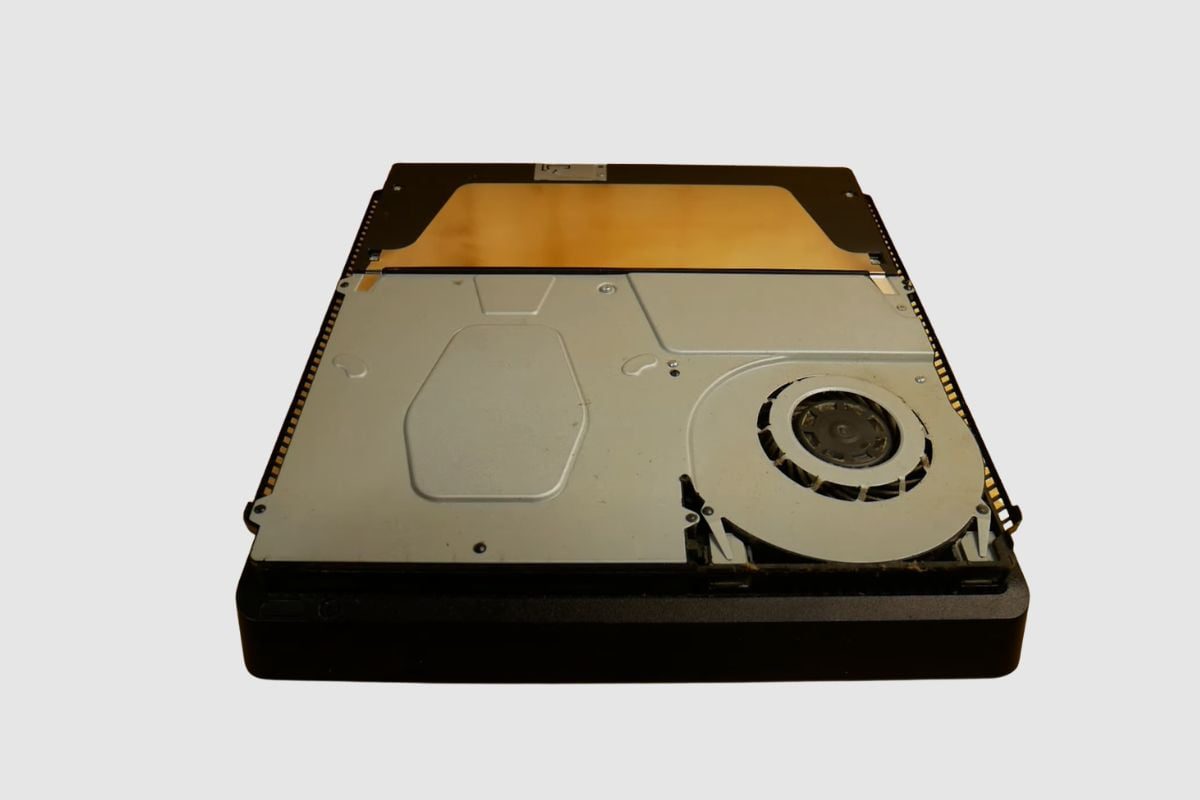
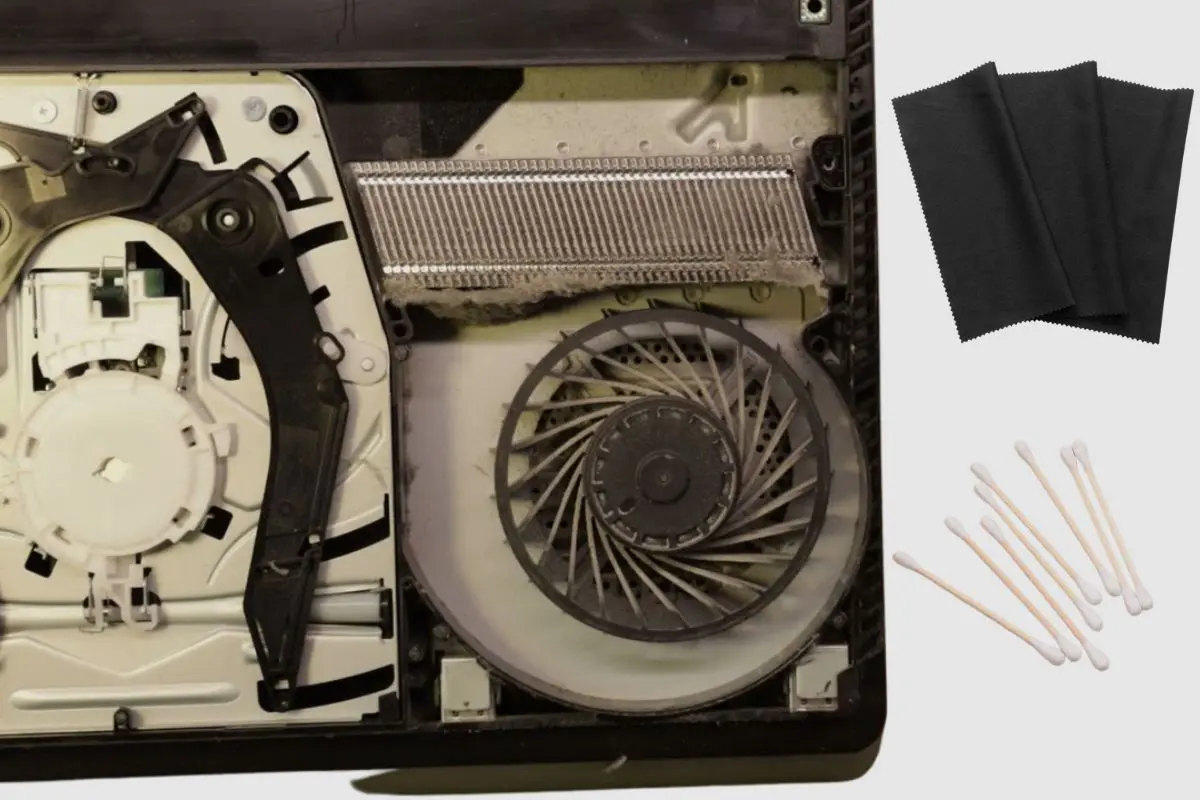
After a general blow-through, you can now focus your attention on cleaning out the fan, heat sink, and edges of the PS4, as these are the spots where the dust builds up the most. Please note that the heat sink is the metal bars beneath the PSU.
- Step Five: Put the PS4 back together.
Once you’ve cleaned out your PS4, it is time to put everything back together, but backwards. First, carefully place the PSU back in its placement spot. You should notice two prongs at the bottom-left corner; you have to make sure they line up with the gap in the PSU. After that, you can proceed to place all the screws back into place. Make sure you make a note of which bolt it is. And, if you didn’t, the longer bolts are for the Philips-head screws with clips at both ends of the PSU.
Once that is done, you will need to snap your cover back into place. You can start with the front side and the place at the end. After that, press down on each edge until you hear a snap to make sure they are placed firmly.
After that, check to see that the bolts are securely fastened in their respective holes before replacing your warranty stickers (if you keep them). However, you’re not fooling anyone by replacing the tags because they will appear scratched when placed back. Once that is done, you can move to the final part of the reassembly process, and that’s the hard drive bay. It is a separate compartment for the hard drive, which doesn’t build up a lot of dust but should still be given a bit of a clean.
- Step Six: Clean out the hard drive bay.
If you hadn’t initially removed the glossy part of your PS4, you could now do so by pressing down on it and sliding it out. That should remove the cover for the HDD, and then you can now use your Philips head screwdriver to remove the larger screw with the PlayStation button icons on it.
After that, you can pull out the HDD and clear out any dust in the chamber, and then use a dry cloth to wipe the dust off the HDD. Once that is done, you can screw in the PlayStation bolt and then slide the cover back on. Once that is done, your PS4 should be all clean and performing properly.

Consequences of Failure to Clean Your PS4 Regularly
One of the main issues you may experience if you do not clean your PS4 regularly is a loud fan. This is due to the fan becoming clogged with dust and dirt, which prevents it from rolling properly and cooling the system effectively. As a result, the console may run slower and heat up more quickly.
Final Thoughts
Once you have gone through the cleaning process listed above, you have completely opened and cleaned your system thoroughly. You should notice that your PS4 will be running smoother and much quieter than before, especially if you haven’t cleaned it out for some time.
I hope you were able to learn a thing or two from this article. Please let me know how the cleaning process went for you, and if you have any more questions, please let me know how I can help you out in the comments section. Once again, thank you so much for reading this.
Image Gallery – How to Remove the PS4 Cover to Clean the Inside of the Console.

References: PS4.